
Automation How-Tos
How to Automate Expense Tracking
The short answer: To automate expense tracking, run every expense through one platform such as Expensify or Ramp. Turn on automatic receipt capture (photo scan, an email forwarding address, and a card feed), build categorisation rules so each expense codes itself, then sync the coded data to your accounting software like QuickBooks or Xero, directly or via Zapier. Add approval rules for anything over a threshold and let compliant claims reimburse on a schedule. Automate the capture and coding; keep a person approving the spend that needs judgement.
Expense tracking is the admin nobody signed up for: photographing crumpled receipts, guessing which category a purchase belongs to, chasing colleagues for the coffee they expensed three weeks ago, and re-keying it all into a spreadsheet at month-end. It is repetitive, error-prone, and it always seems to land the day a report is due. Almost all of it can run on its own.
This guide covers the specific loop that expenses follow, from the moment money is spent to the moment it lands, categorised, in your books. It is distinct from wider accounting automation: here the focus is receipt capture, categorisation rules, approvals, reimbursement, and reporting. The aim is not to remove oversight but to remove the typing, so your job shifts from data entry to a quick, confident approval. We will be clear throughout about what is safe to hand to software and what still needs a human.
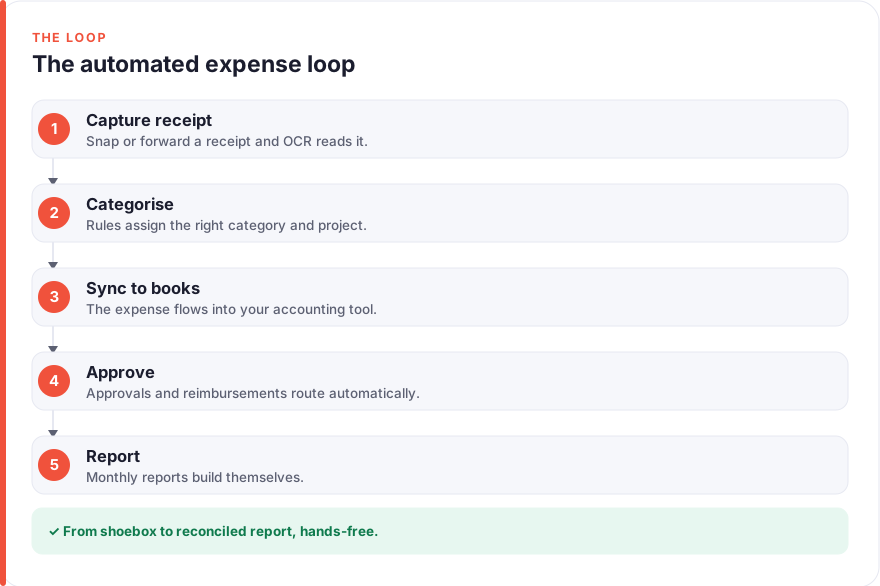
Before you start
A little groundwork makes this far smoother. First, decide who spends and how: company cards, personal cards claimed back, or a mix. Automation is cleanest when spending runs through cards that feed data directly, so it is worth consolidating where you can. Second, gather the pieces the automation will connect: your accounting tool logins, your card provider details, and a simple list of the expense categories and tax codes you actually use. Third, decide who approves what. Even a two-person business benefits from a clear rule for who signs off spend above a certain figure. Automating expenses is one of the higher-value repetitive tasks worth removing from your week, so it pays to set the foundations once.
Step 1: Map your expense flow and pick a tool
Before choosing software, sketch how an expense actually travels through your business today: someone spends, a receipt appears, it gets categorised, someone approves it, and eventually it is reimbursed or reconciled. Mapping this shows you where the manual handoffs are, and those handoffs are exactly what you will automate.
Then pick a dedicated expense platform to run the loop. Two common choices sit at different ends of the market. Expensify is a long-standing option built around receipt scanning and expense reports; its Collect plan is roughly $5 per member per month (July 2026, per Expensify — check the vendor for your region and plan). Ramp pairs corporate cards with expense software and its core plan is free, with a paid Plus tier at roughly $15 per user per month (per Ramp, July 2026 — Ramp has account and eligibility requirements, so confirm you qualify).
Choose on three things: whether you need cards issued (Ramp leans card-first; Expensify works with your existing cards), which accounting software you use and how cleanly the tool syncs to it, and the size of your team. Resist over-buying. Start on the plan that covers capture, rules, and one accounting sync, and upgrade when approvals or higher volume actually demand it.
Step 2: Automate receipt capture
The receipt is where expense tracking usually breaks, because it depends on a human remembering to keep a scrap of paper. Automating capture removes that fragility. Set up three routes so paperwork arrives without anyone re-keying it:
- Photo scan. Staff photograph a receipt in the mobile app the moment they pay. Built-in OCR (Expensify calls its version SmartScan) reads the merchant, date, amount and tax and turns the image into a draft expense.
- Email forwarding. Give everyone a unique forwarding address so digital receipts, the ones that arrive as email confirmations, can be forwarded once and filed automatically.
- Card feed. Connect company cards so each transaction appears in the tool the day it clears, ready to be matched to its receipt.
The card feed is the quiet powerhouse here. When a card charge and a scanned receipt describe the same purchase, the tool matches them and you have a complete, evidenced expense with zero typing. The one habit to build across the team: capture at the point of purchase, not in a month-end scramble, so nothing goes missing.
Step 3: Build categorisation rules
Capture gets the expense in; categorisation makes it useful. A categorisation rule tells the platform how to code a recurring type of spend: which expense category it belongs to, which tax rate applies, and which project or client to bill it against. Set these up once and the software applies them every time.
The pattern is “when the merchant (or amount, or card) looks like this, code it like that.” A charge from a rideshare app becomes Travel; a well-known software vendor becomes Software subscriptions with the right tax treatment; spend on a specific card can be tagged to a specific project automatically. After a few weeks of real transactions, the tool recognises most of your regular spend and pre-codes it, so categorisation becomes a case of confirming rather than deciding.
This is safe to automate for routine, repeating spend. Keep a human eye on the exceptions: unusual merchants, round-number amounts that might be split personal-and-business, anything the tool flags as low-confidence, and categories with awkward tax rules. Rules handle the boring 90 per cent; you handle the odd 10 per cent that needs a judgement call.
Step 4: Sync to your accounting software
An expense coded inside your expense tool still needs to reach your books. This step connects the two so categorised expenses, with their receipt images attached, flow into your accounting software without a second round of data entry.
Most expense platforms offer a direct integration with the major accounting tools, QuickBooks and Xero chief among them. A direct sync maps your expense categories to the matching accounts in your chart of accounts, then pushes each approved expense across on a schedule or on approval. This is the cleanest option when it exists, because the field mapping is built and maintained for you.
Where a direct integration is missing or too rigid, Zapier bridges the gap. Zapier connects apps with a “when this happens, do that” workflow: when an expense is approved in your tool, create the matching transaction in your accounting software. Its free tier covers 100 tasks a month and the Professional plan starts at roughly $19.99 per month (per Zapier, July 2026 — a task is one action, so map your monthly expense volume before choosing a plan).
Step 5: Automate approvals and reimbursement
Approvals are where expense tracking most often stalls, so this is a high-value step, but also the one to automate with the most care, because it is where money leaves the business. The goal is to automate the routine approvals and route only the genuine exceptions to a person.
Set approval rules based on amount, category or spender. Small, in-policy expenses, a modest lunch, a taxi within the usual range, can be auto-approved or approved with a single tap. Anything over a threshold you set, or in a sensitive category, routes automatically to the right approver with the receipt and coding already attached, so they decide in seconds rather than reconstructing the claim.
Once an expense is approved and it is a reimbursable personal-card claim, reimbursement can run on a schedule: the tool batches approved claims and pays them back on a fixed day, often straight to the employee’s bank. Company-card spend needs no reimbursement at all; it is simply reconciled against the card feed.
This is the area where “automate, but verify” matters most. Auto-approving genuinely routine spend is safe and saves everyone time. Auto-approving everything is not: it removes the check that catches duplicate claims, out-of-policy spend, and honest mistakes. Set the threshold conservatively at first and loosen it as you build trust in the rules.
Step 6: Schedule reports and a monthly review
The final step turns your now-automated expense data into something you actually use. Schedule the reports that matter, spend by category, spend per employee or team, and spend against budget, to email themselves to you on a fixed day each month. Most tools also offer a live dashboard you can glance at any time.
Automation makes the numbers accurate and timely; it does not tell you what they mean. So book a recurring monthly slot to read them. This review is where you catch the things automation cannot: a subscription quietly renewing that nobody uses, travel spend creeping past budget, or one team’s costs drifting for a reason worth understanding. Share the same live data with your accountant or bookkeeper so they can flag issues early rather than at year-end.
The through-line, as with any good automation, is that the system does the counting and you do the thinking. Accurate, on-time expense data is only valuable if someone acts on it.
Common pitfalls to avoid
A few mistakes turn a time-saving setup into a new source of mess. Watch for these:
- Automating a broken process. If your categories and approval rules are unclear on paper, automating them just makes the confusion faster. Fix the process first, then automate it.
- Mixing personal and business cards. The moment spend is split across accounts you cannot fully trust, the card feed stops being reliable. Keep business spending on business cards wherever you can.
- Over-tight or over-loose approval rules. Set the threshold too low and every coffee needs a sign-off; too high and risky spend sails through. Start conservative and adjust from real data.
- Skipping the category-to-accounts mapping. An unmapped sync dumps expenses into a catch-all account and creates reconciliation work later. Map it properly once.
- Treating it as set-and-forget. Cards get reissued, integrations expire, and a renamed category can silently break a rule. Glance at the run history and flagged items regularly.
FAQ
What is the best way to automate expense tracking?
The most reliable approach is to run every expense through a dedicated platform such as Expensify or Ramp, turn on automatic receipt capture, build categorisation rules, and sync the coded data to your accounting software. Add approval rules so routine spend clears automatically and only exceptions reach a person. Automate the capture and coding, and keep a human approving spend that needs judgement.
How do I capture receipts automatically?
Use three routes together: photograph receipts in the mobile app so built-in OCR reads them, forward email receipts to a unique address that files them automatically, and connect a card feed so each transaction appears with its paperwork ready to match. The card feed plus receipt scanning combination means most expenses are captured and matched without anyone re-keying anything.
Can I connect my expense tool to QuickBooks or Xero?
Yes. Most expense platforms offer a direct integration with QuickBooks and Xero that maps your categories to your chart of accounts and pushes approved expenses across automatically. Where a direct sync is missing, Zapier can bridge the two apps with a simple “when an expense is approved, create the transaction” workflow.
Is it safe to fully automate expense approvals?
Automate the routine and route the rest. Small, in-policy expenses are safe to auto-approve, which frees up real time. But auto-approving everything removes the check that catches duplicate claims, out-of-policy spend and honest errors. Set a conservative threshold so anything large, unusual or flagged still reaches a person before it is paid, then loosen it as you build trust in the rules.
How much does expense tracking automation cost?
It varies by tool and team size. As a rough guide (July 2026, check the vendor), Expensify’s Collect plan is around $5 per member per month, Ramp’s core plan is free with a paid tier around $15 per user per month, and Zapier offers a free tier with paid plans from around $19.99 per month if you need it to bridge apps. Weigh the running cost against the hours of manual admin it removes rather than the sticker price alone.
Do I still need to keep paper receipts?
Once your tool has captured a digital copy attached to the expense, most tax authorities accept the digital record, but rules vary by country, so confirm your local requirements. In practice a scanned, matched receipt is far more reliable than a drawer of fading thermal paper. Check retention periods with your accountant before you throw anything away.
We have no affiliate relationships with the tools mentioned here; see our disclosure for how we approach this, and our about page for how we test and write these guides.